Technical Overview
OLA's MK3
This is what sets us apart.
Precision
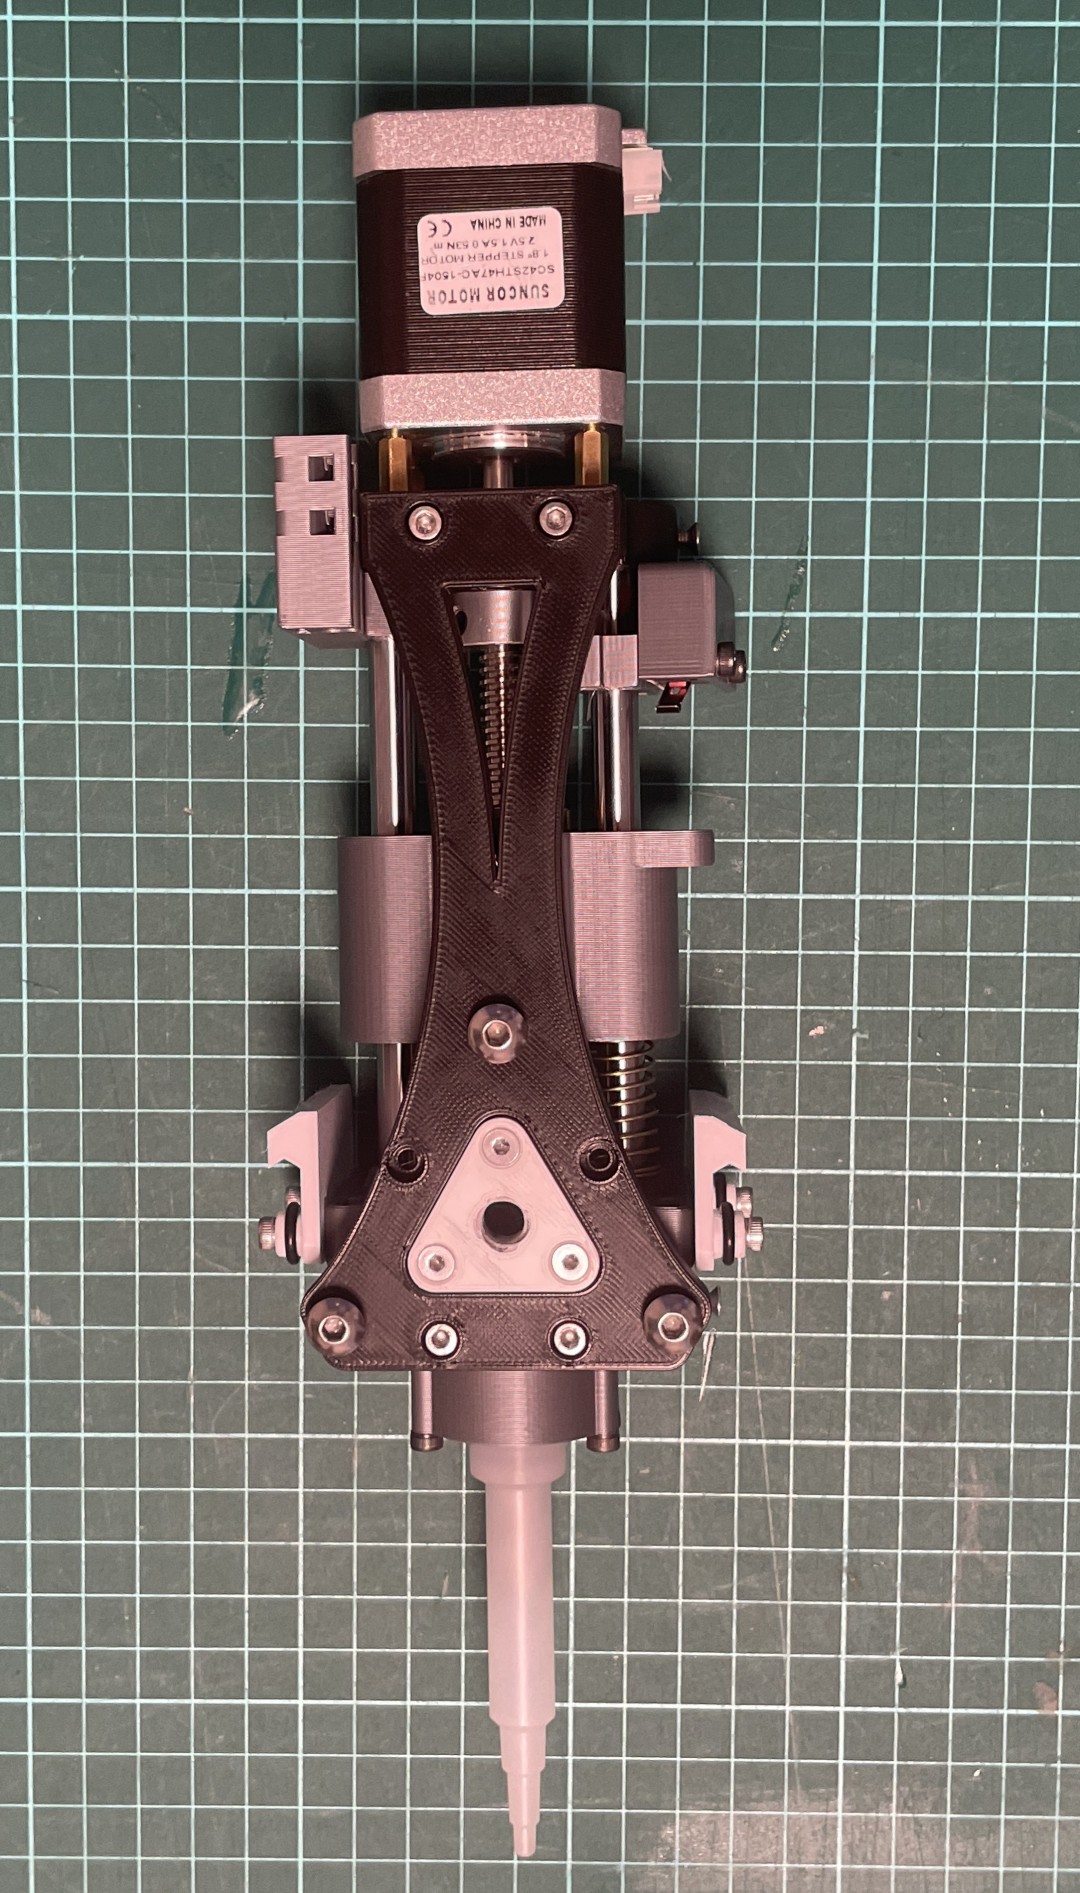
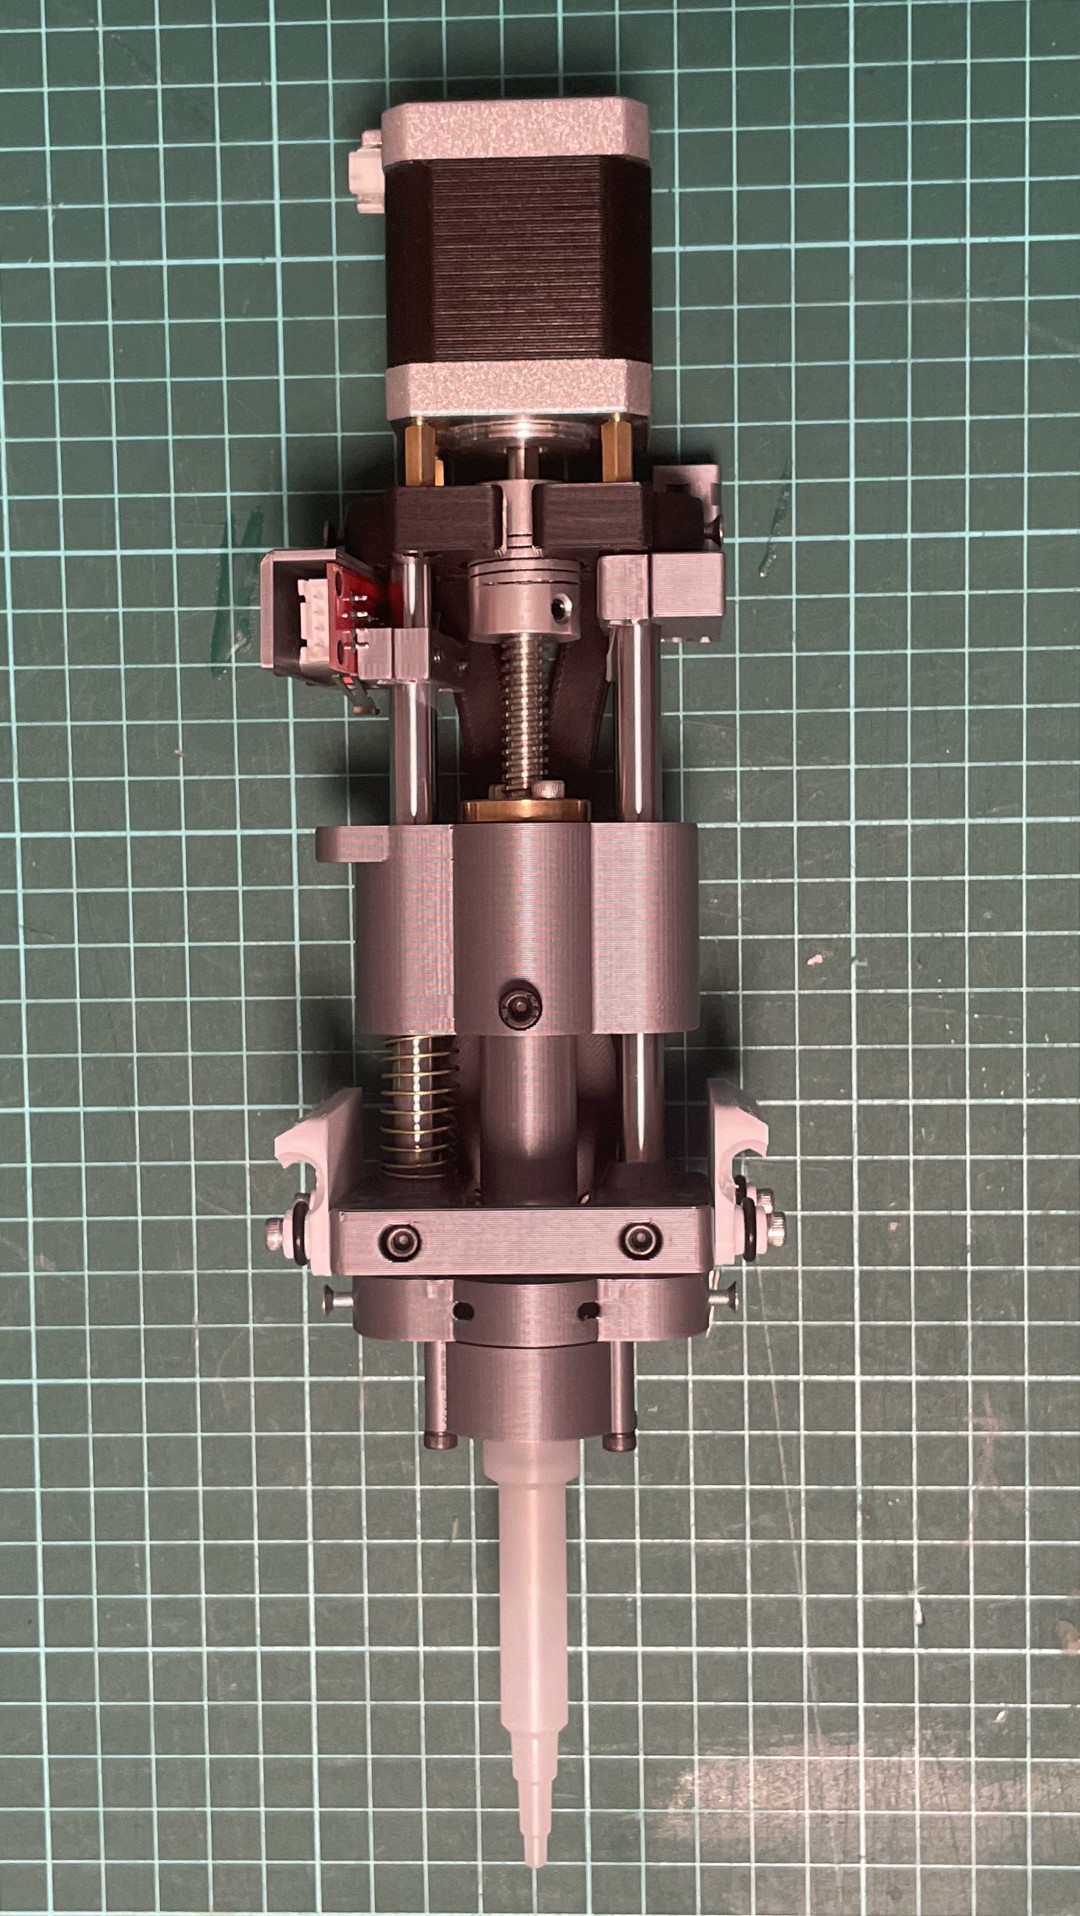
OLA's MK3 includes a new micro-pipette, based on the traditional o-ring design.
Its accuracy is on par with your usual micro-pipettes, at about ~1% relative error, and is much more affordable.
It's custom tip-holder was designed to be compatible with the three major tip sizes used in molecular biology, for a total range of 1-1000 uL in a single tool.
This reduces costs and saves time, as no tool-change is needed to use a different tip size.
Lastly, it is the only automated micro-pipette that uses standard components, and open source parts. You will be able to service this pipette anywhere, with ease, and at a low cost.
One pipette to rule them all.
Flexibility
Another main difference between our robot and others is that ours can be adapted to a wide range of laboratory tasks and workflows thanks to its tool-changer mechanism.
This means that a variety of tools and equipment, such as micro-pipettes, cameras, and probes, among others, can be attached to the robot, making it a versatile and adaptable solution for laboratory automation.
This allows you to have a single low-cost CNC machine with multiple functions and applications in molecular biology.
And, if your experiments change, your robot can too. There will always be a use for it.
Affordability
Pipettin Bot was designed to be affordable and easy to use, so that anyone can make or buy it. This means that more people can use their time to do more research, rather than focusing on repetitive or tedious tasks.
Open source projects are often free or low-cost, which can make them a more affordable option than commercial ones. This is especially true in terms of development and maintenance.
As a result, you can buy 8+ of OLA's robots (or make 30) for the price of the closest commercial alternative. For real!
We believe it is now possible to automate laboratories, Biotech companies, and more institutions anywhere in the world.
This is laso the goal of the Gathering of Open Science Hardware, who have kindly supported us since the beginning.
To make Open Science Hardware ubiquitous!

Open Source
Open source makes OLA's documentation available to people all around the globe.
This website, GitLab, and the Discord server are all accessible for anyone to explore and learn from.
Open source projects accelerate innovation, which can be really fast paced.
This is because they invite a large community of people to share ideas and work on the project. We call our community Open Lab Automata.
The project's sources are listed here.
Mechanics
Everything mechanical about the robot.
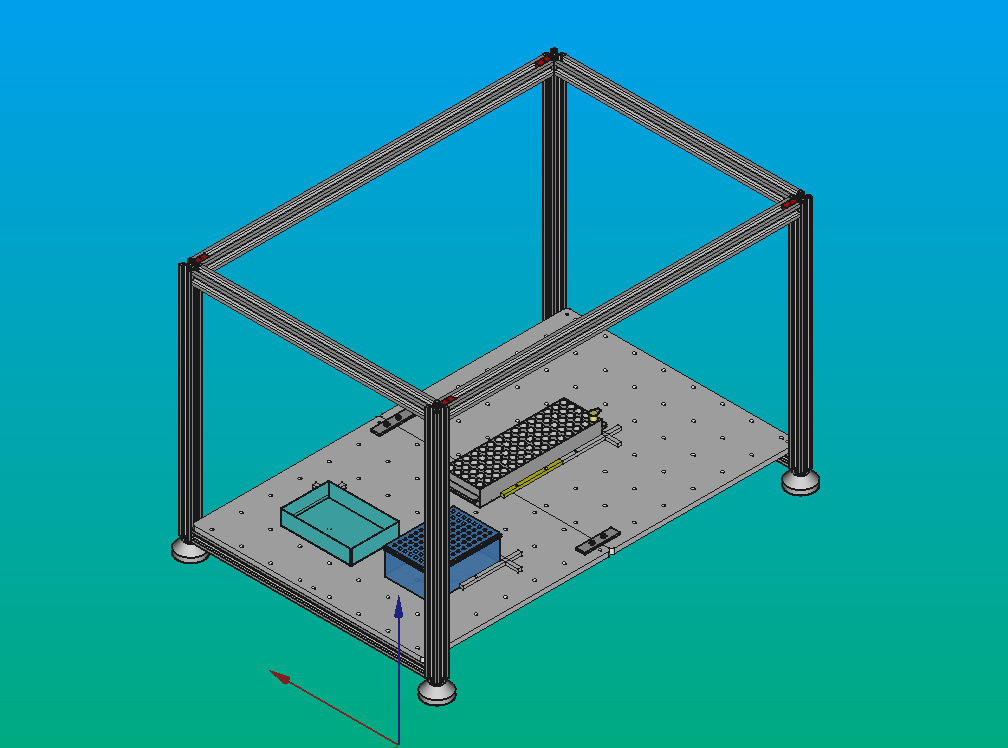
Baseplate
The baseplate connects the machine's structural frame to various protocol objects such as tube and tip racks. It is no more than a "table" with regular holes on which curb are attached, allowing you to align objects on its surface.

To learn more about the baseplate drawings, manufacturing instructions and design notes visit Baseplate
Structure
All of the Pipettin bots parts are assembled inside the structural frame, such as the baseplate and the carriages. Therefore, building the structural frame is the first step in the assembly process.

The motion system will be mounted on the top of the structure.
The baseplate will be located on the bottom of the structure, where different labware items can be placed. We call those platform items.
To learn more about the structural frame, manufacturing instructions and design notes visit Structural Frame
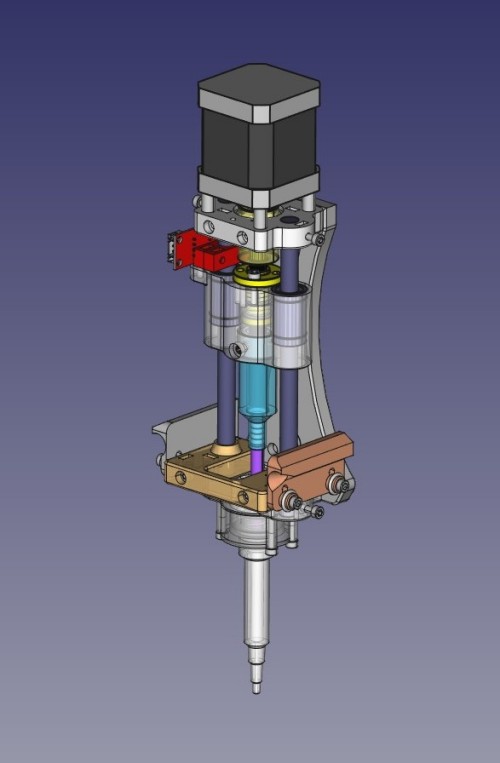
Motion system
Three linear actuators are mounted on the structure.
All of them are belt-driven, with the Z-axis featuring a mechanical reduction to increase torque roughly equivalent to a 8x4 leadscrew.
To learn more about the motion system, manufacturing instructions, and design notes visit Motion System.

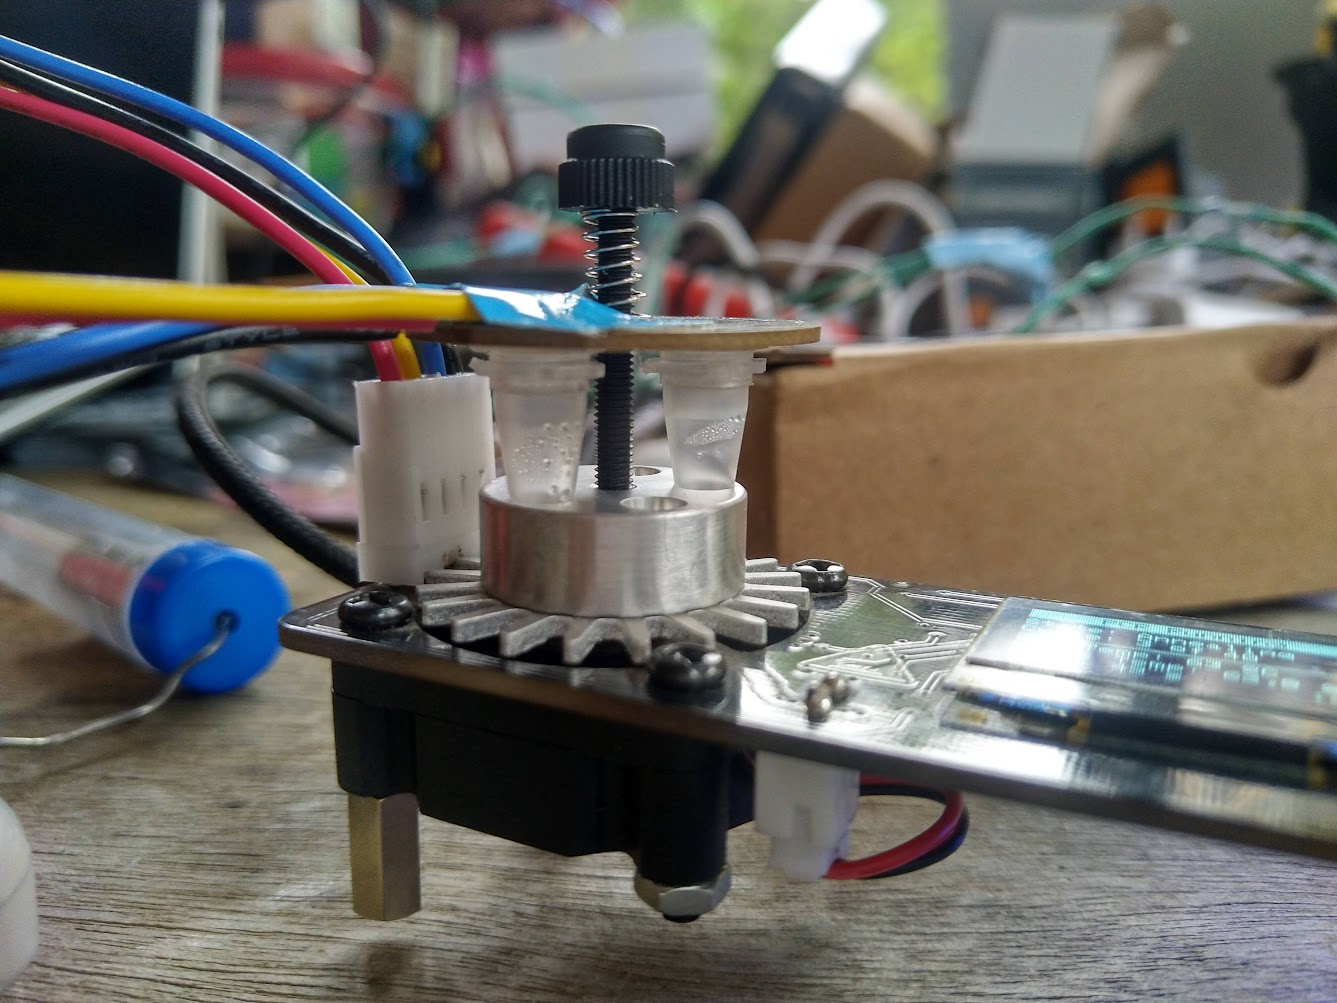
Micropipettes
In the Pipettin Bot project, we decided to dive into the adventure of building our very own pipette from scratch:
To learn more about the pipette, manufacturing instructions, and design notes visit the Micropipettes page.
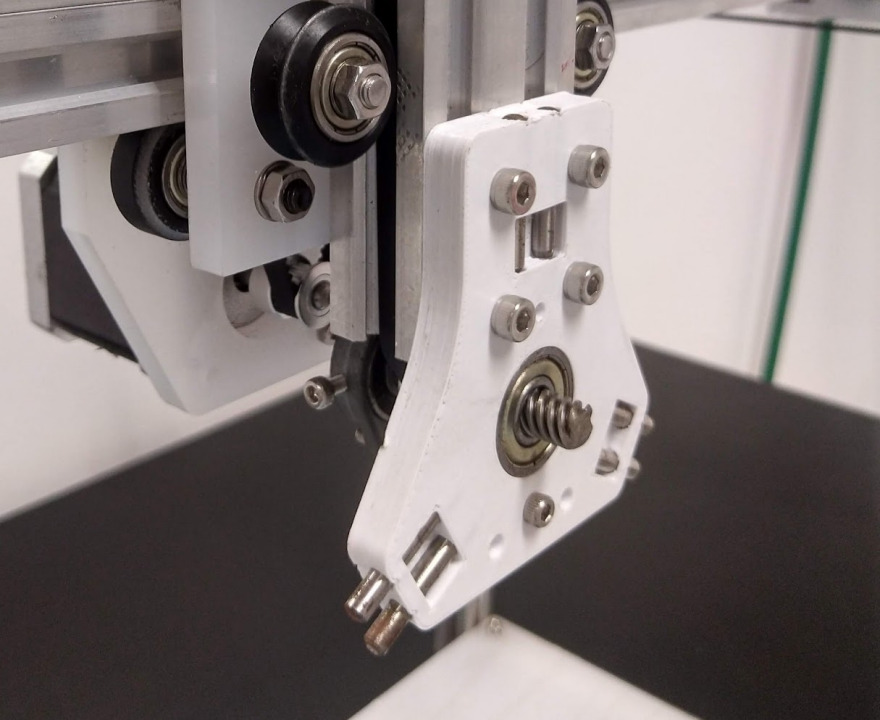
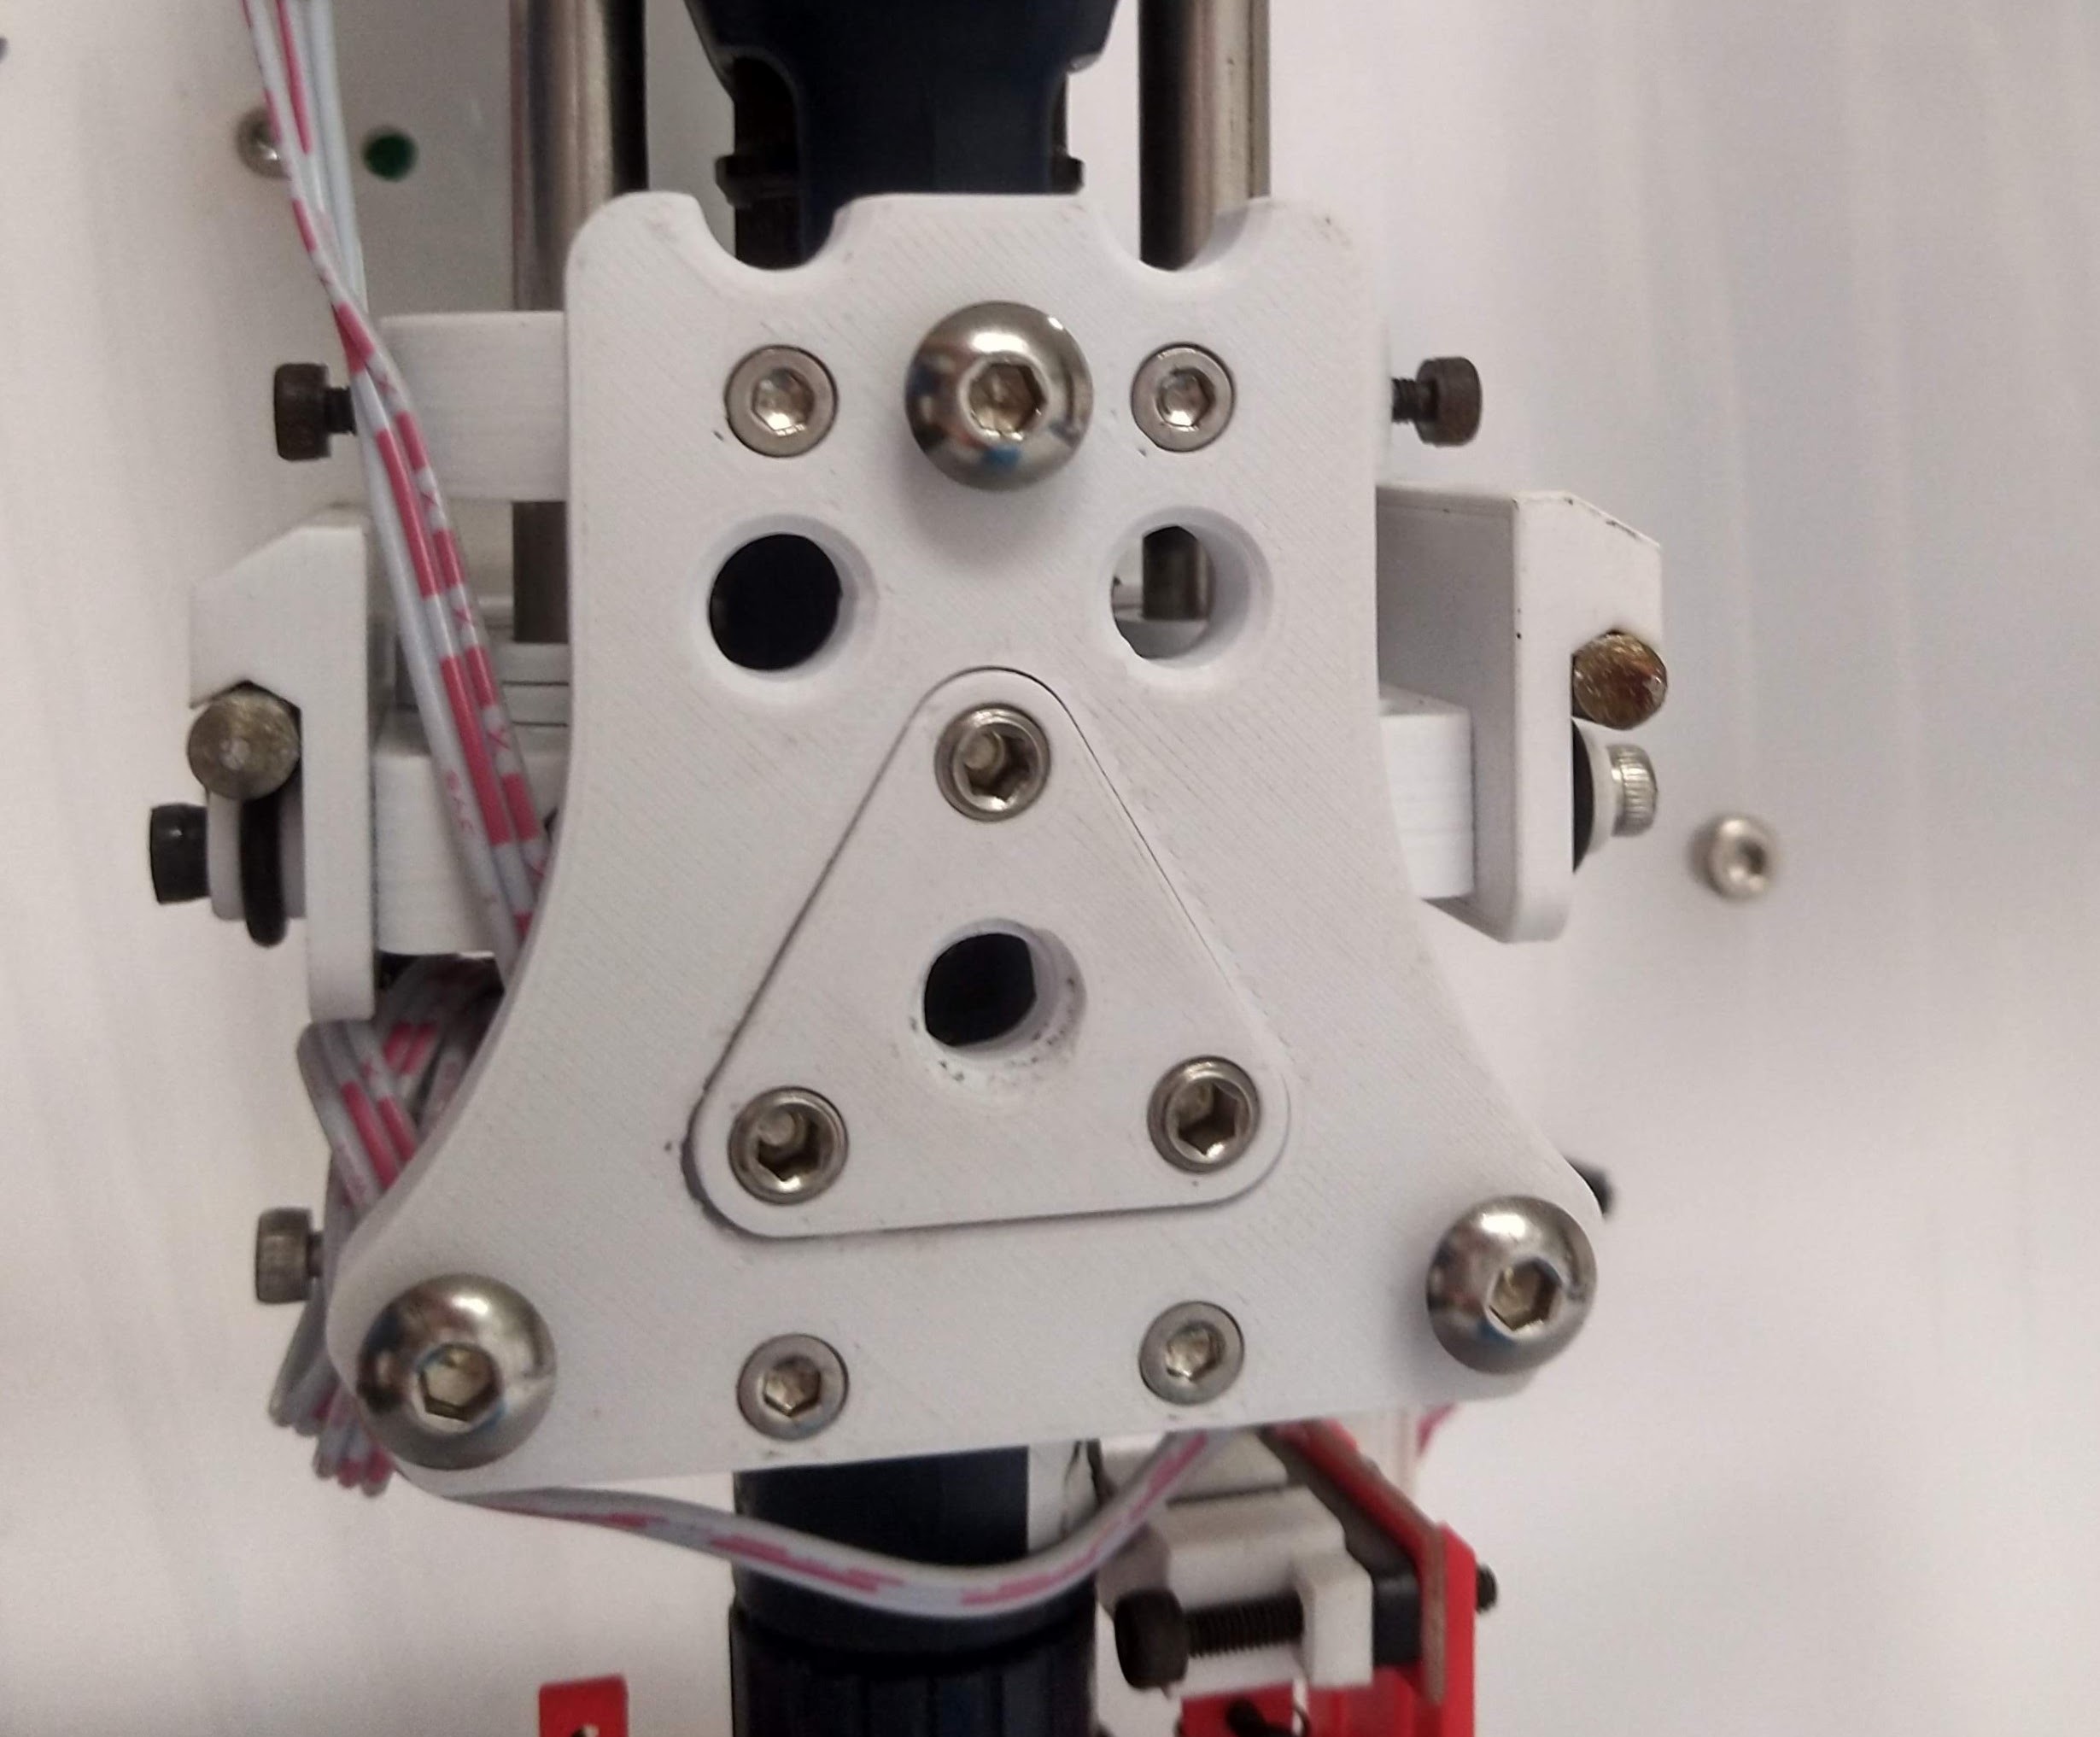
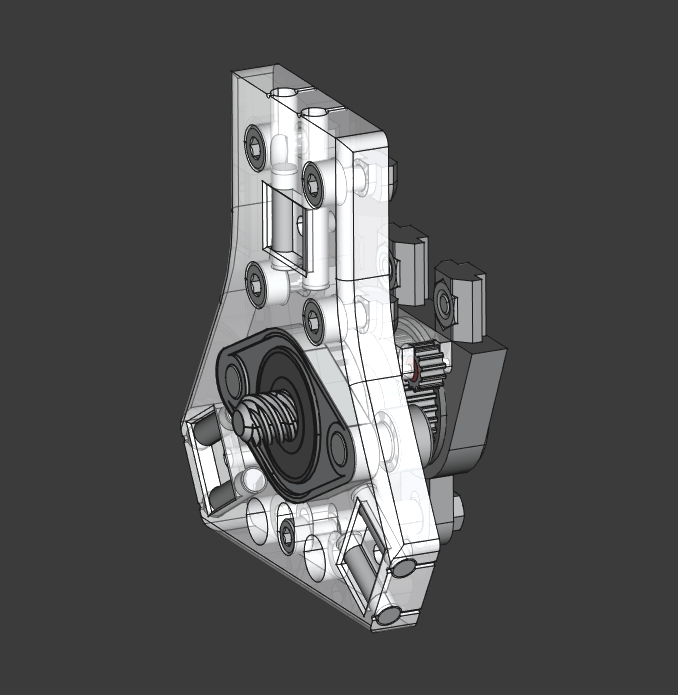
Tool-changer
As mentioned above, Pipettin Bot comes with an amazing tool-changer mechanism, inspired by the awesome Jubilee Project and E3D's tool-changer design.
This mechanism enables robots to switch between various types of tools such as pipettes, dispensers, mixers, and probes, among others, depending on a protocol's requirements.
The interface is the same that Jubilee uses, making all tools compatible. Only a swap of wedge-plates is needed.
To learn more about the tool-changer, manufacturing instructions, and design notes visit the Tool-changer page.
Control Electronics
Below is an overview of Pipettin's main control electronics.
To learn more about the electronics, assembly instructions and design notes visit the Electronics page.

Open-loop
Pipettin bot uses stepper motors to achieve controlled motion. This open-loop setup is simple and proven to work well within certain boundary conditions.
In open-loop control, stepper motors operate without feedback. In this configuration, the motor driver sends a sequence of pulses to the motor, which causes it to move in steps. However, the system does not have any feedback mechanism to confirm if the motor has reached the desired position (i.e. actually carried out the steps).
The only feedback is provided by limit switches at the start of a protocol, through a process called "homing". When the stepper motors are first powered on, the robot's position is uncertain. During homing, the machine moves its axes until each one triggers its own limit switch (a.k.a. an endstop). The machine is then considered to be at the "home position", which corresponds to a set of position values associated with it (e.g. x=0, y=0, z=0, etc.).
Open-loop control and stepper motors are commonly used in CNC for their simplicity, cost-effectiveness, and ability to provide accurate and repeatable motion control required for precise tasks. Pipetting bots typically perform operations at relatively low speeds and require accurate positioning, making this a suitable choice for the application.
There are many types of motors, and some of them even include electronics for closed-loop control. You can always choose to use more advanced control techniques, and modify pipettin accordingly.
Firmware
We use a fork of the popular 3D-printer firmware we call: Klipper for CNC
- Klipper runs on the Arduino
- Klippy runs on Raspberry Pi
Klipper is a firmware that runs on a Raspberry Pi and can control multiple axes. It receives step and time instructions from the microcontrollers and executes them. Four ports are connected to the Raspberry Pi, allowing Klipper to control multiple axes simultaneously.
The project has moved from GRBL to Klipper, but will stick to the Arduino UNO + CNC shield. Using more expensive boards is trivial with Klipper.
The directory contains general information relevant to the specific configuration for this project.
The full Klipper software stack has been forked and published over here:
- Meta-repo including all forks as submodules: https://gitlab.com/open-la-deps/forks/firmware/klipper-stack
- All forks, including Klipper: https://gitlab.com/open-la-deps/forks/
Hardware
Controller board
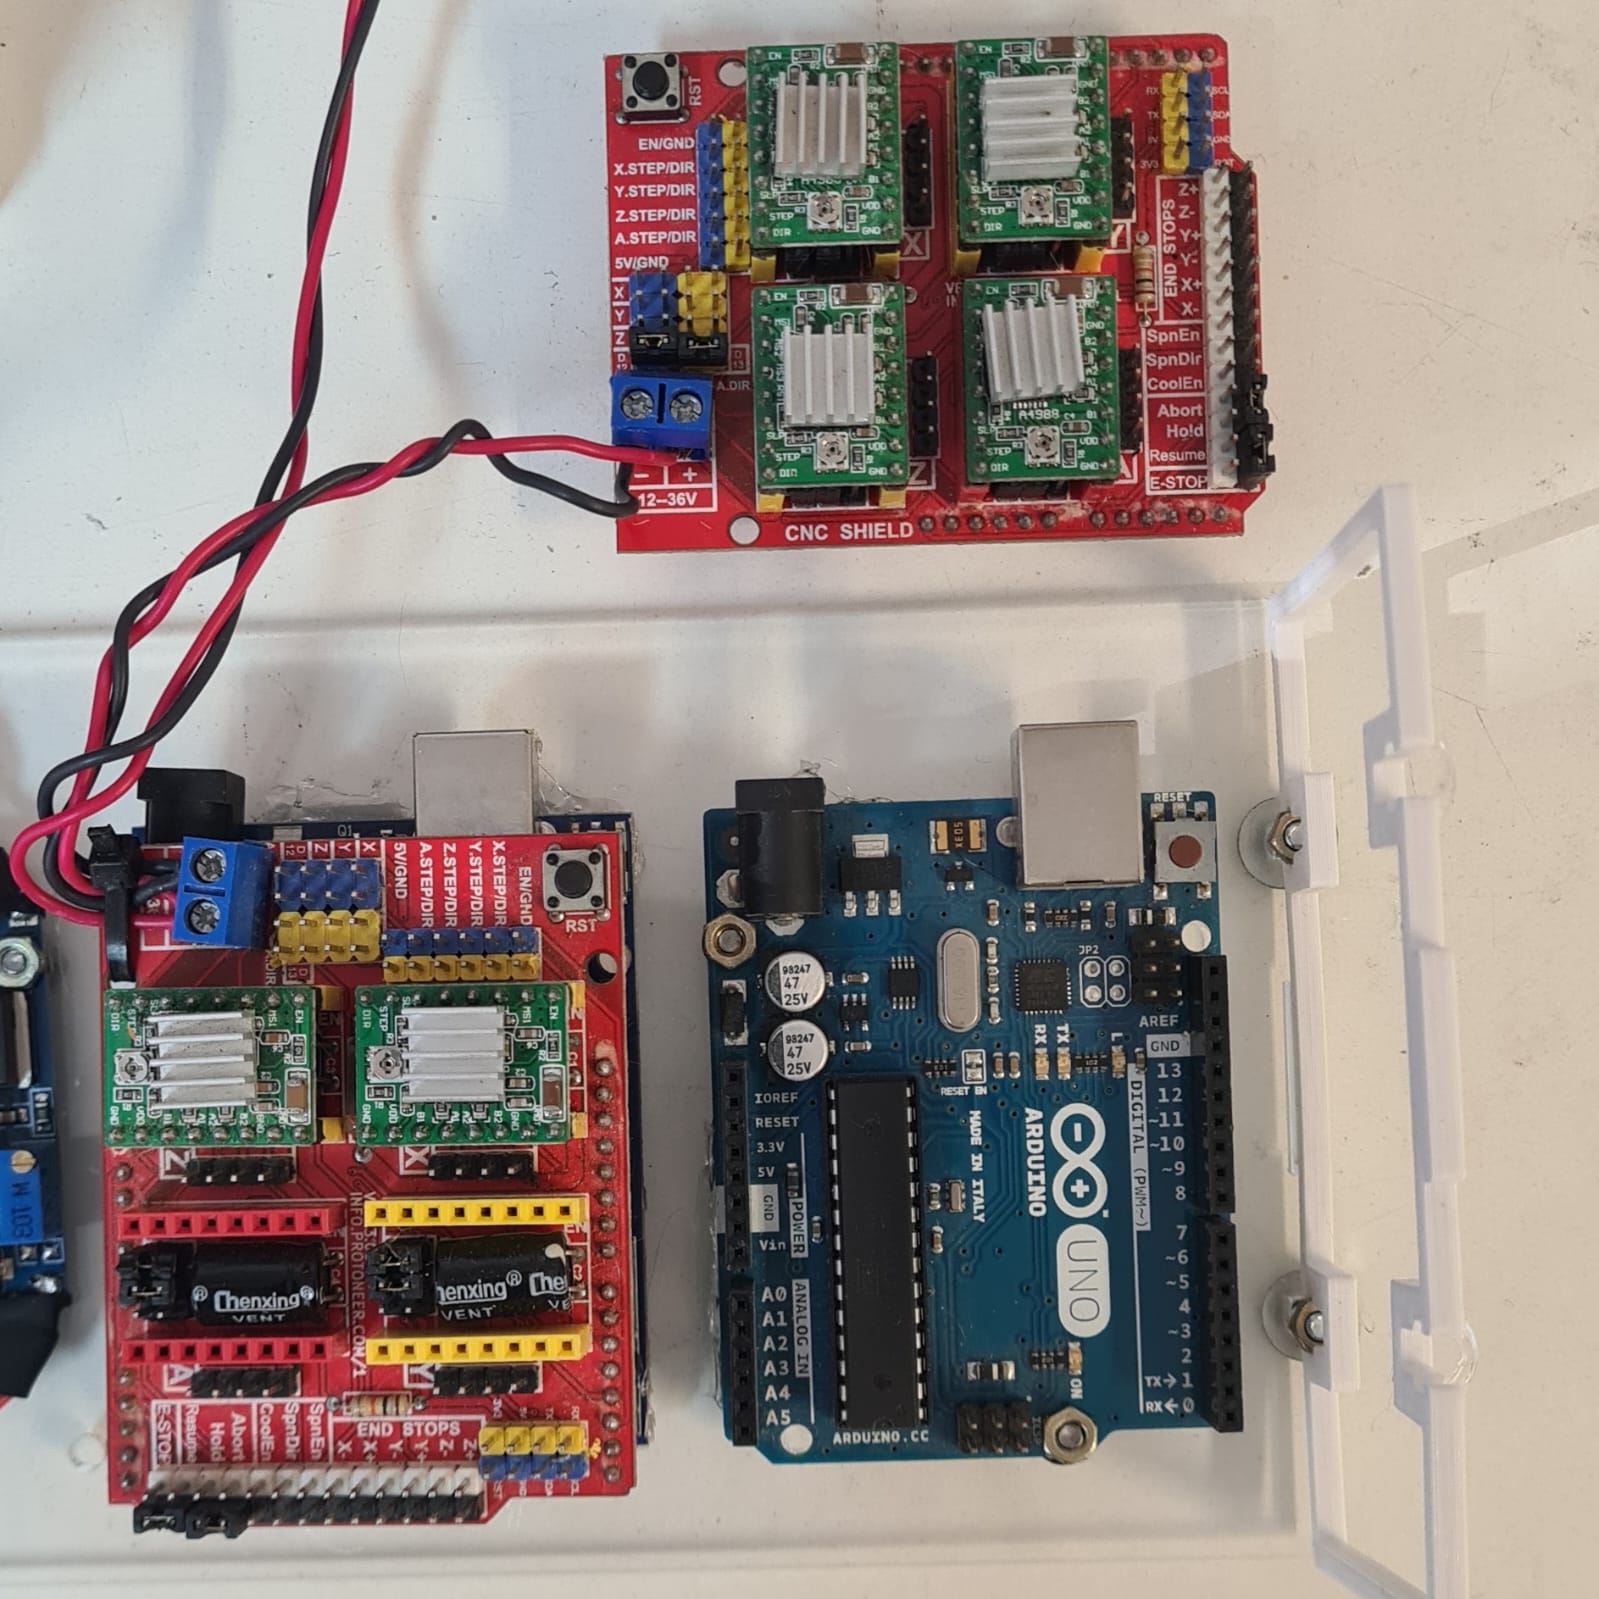
We use a pair of Arduino UNOs to achieve 7-axis synchronized motion.
The Arduino is a board based on an ATMEL microcontroller. Microcontrollers are integrated circuits that can be programmed to perform specific tasks. The Arduino IDE is a software environment that allows you to write and upload programs to the Arduino board.

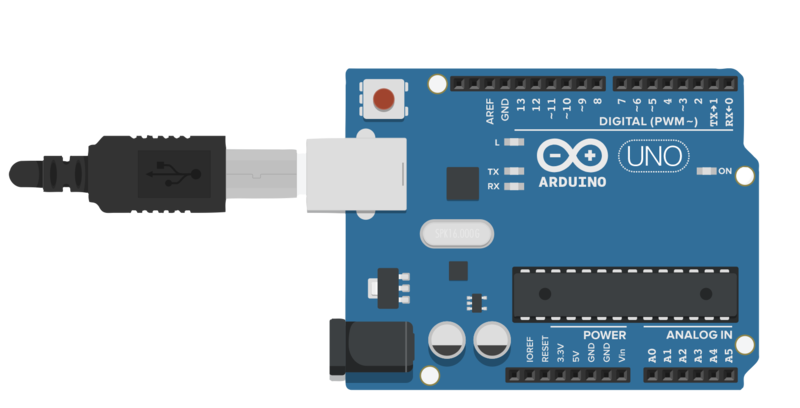
Generic Uno © Olaldin, licensed under CC BY-SA 4.0.
The Arduino has two interfaces: an input interface and an output interface. The input interface allows you to connect different types of peripherals to the Arduino board. The output interface allows you to send data from the Arduino board to other peripherals.
The input interface is used to read data from peripherals. For example, you can connect a button to the input interface and the Arduino will be able to read whether the button is pressed or not. You can also connect a sensor to the input interface and the Arduino will be able to read the sensor's data.
The output interface is used to send data to peripherals. For example, you can connect an LED to the output interface and the Arduino will be able to turn the LED on or off. You can also connect a speaker to the output interface and the Arduino will be able to play sounds.
In several words, the raspberry pi tells the Arduino when it has to make a step, then the Arduino raises a pin and that is received by the pololu and takes care of motion.
Serial communication between the Raspberry Pi and Arduino is through a USB port.
To summarize:
- The Raspberry Pi sends a signal to the Arduino.
- The Arduino receives the signal and interprets it as a command to make a step.
- The Arduino raises a pin, which is a physical connection that is used to send data to the Pololu.
- The Pololu receives the signal from the Arduino and takes care of the motion.
Arduino Uno (Versión Informática) © Maxbrothers2020, licensed under CC BY-SA 4.0.

Arduino Pinout Diagram © Arduino.cc, licensed under CC BY 4.0.
Arduino Pinout diagram
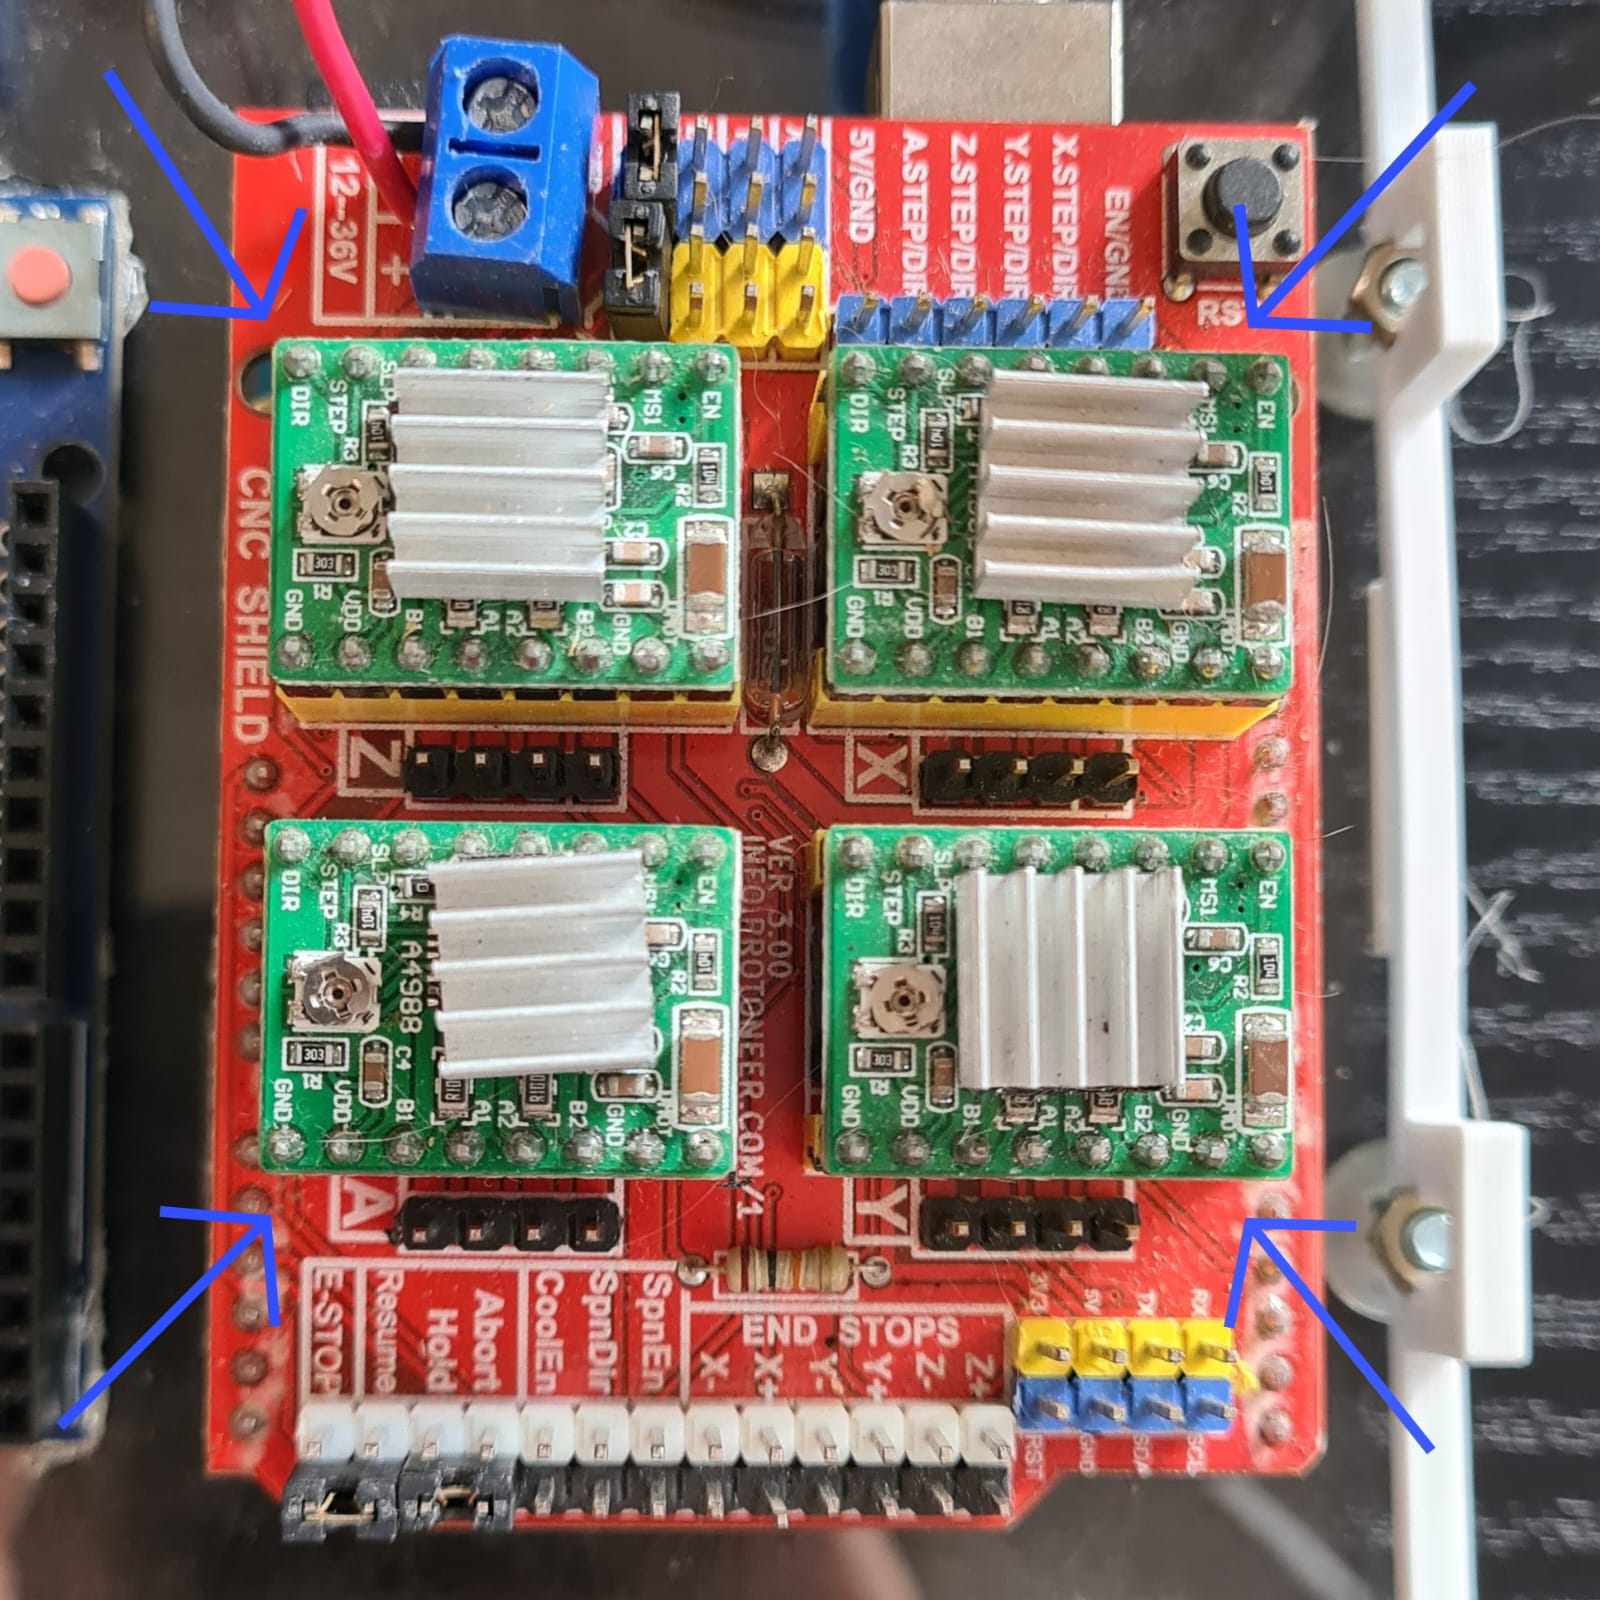
CNC Shield
The CNC Shield for Arduino is a small board that makes it easy to control up to 4 stepper motors with your Arduino. It is a shield, which means that it plugs directly onto the Arduino board. The CNC Shield supports 4 Pololu A4988 power controllers, which are not included. It also has all the necessary connections to connect limit switches, relay outputs, and various sensors.
The CNC Shield is fully compatible with the GRBL/Klipper control firmware. This means that you can use it to control a CNC machine or other similar device. The CNC Shield can be used with any Arduino model, but it is recommended to use an Arduino UNO type model.

Arduino UNO compatible board, CNC shield stepper motor controller, and a NEMA 17 stepper motor © DotEagle, licensed under CC BY-SA 4.0.
Stepper Drivers
The Pololu A4988 is a basic stepper motor driver that simplifies the control of stepper motors from a PLC or processor, such as the Arduino. In other words, it controls the movement of the motors.
The A4988 handles the high voltages and currents that stepper motors require. It also limits the current that circulates through the motor, and provides protections to prevent damage to the electronics.

Main computer
The Raspberry Pi is the bot's main computer.
It has the GUI's web service and the interpreter which translates all the commands into GCODE for the firmware, and is connected to the CNC electronics through regular USB cables.
Raspberry Pi
The Raspberry Pi computer is open-source hardware too.
Here are relevant guides for this project:
- Raspberry Pi software setup.
- Systemd units for the Raspberry Pi.

RaspberryPi Model 4B © Jstrom99, licensed under CC BY-SA 4.0.

Raspberrypi block function v01 © Wirepath, licensed under CC BY-SA 3.0.
Software
Software for the pipettin bot project.
Components and general information flow:

Controller: piper
The main robot controller is the piper python module. This is the central python module handling GCODE generation for protocols, and robot operation.
piper also handles commands from the Pipettin Writer GUI. The are received as socketio "events", sent by the GUI's backend.
To drive the dobot, piper interacts with Moonraker, a web server that exposes APIs with which client applications may use to interact with the 3D printing firmware Klipper.
Its functionality is extended by plugins, which add important features. For instance, the p2g_command plugin receives commands from the GUI, in order to execute pipetting protocols.
SocketIO & Moonraker
SocketIO is a library that enables real-time, bidirectional and event-based communication between the browser and the server. Moonraker is a Python 3 based web server that exposes APIs with which client applications may use to interact with the 3D printing firmware Klipper.
Source: https://gitlab.com/open-la/pipettin-piper
Licensing terms can be found in the repositories.
Web Frontend
"Pipettin Writer" is a web interface for writing and executing pipetting protocols.
It is designed for creating protocols and operating the Pipettin bot in without coding, imitating the lab bench in every aspect.
The web app offers a friendly interface to interact with the robot.
With it, users can create workspaces, protocols, and edit various platforms (tube racks, tip racks, petri dishes, or buckets) used within the workspace. This works with your brand of labware, as long as you can measure its dimensions.

Pipettin Writer is developed using web technologies, primarily based on a client-server architecture. The frontend of the web app is built using HTML, CSS, and JavaScript, with the help of popular front-end libraries and frameworks such as React.js, Redux, and Material-UI. These technologies provide a dynamic and user-friendly user interface where users can create workspaces, define platforms, and set up protocols conveniently.
On the server-side, the web app utilizes Node.js as the runtime environment and Express.js as the backend web framework. This combination allows the app to handle incoming HTTP requests from the frontend, manage routes, and interact with the robot through various API endpoints, as mentioned before.
In summary, Pipettin Writer serves as an easy-to-use web app for interacting with the Pipettin bot. Additionally, the future features planned for the app aim to further enhance its functionality and performance.
- Start the GUI.
- Software Install requirements.
The frontend of our Web App is built using React.js, Redux, and Material-UI. To connect the frontend with the backend (Node.js), the app utilizes HTTP requests and responses over the network.
Overall, React.js simplifies UI development, enhances performance, and promotes maintainable code, making it an ideal choice for building modern, interactive, and scalable web applications.
It is Open Source Software, with source files available and maintained on GitLab. Specific and updated licensing terms can be found in the repositories.
- GUI repository: https://gitlab.com/open-la/pipettin-gui
Backend and API
The backend of the Pipettin Writer web-app uses Node.js and Express.js, and exposes a public API.
More information below and at the repo's technical documentation.
Info
Node.js: is a lightweight, event-driven JavaScript runtime environment that runs on the V8 JavaScript engine. It is used to build scalable and real-time applications, especially on the backend, where it can handle network requests, file I/O, and databases.
Info
Express.js is a popular web application framework for Node.js. It provides a set of functionalities and utilities that simplifies the process of building web applications and APIs. Express.js acts as a middleware, allowing you to handle incoming HTTP requests and define how your application responds to those requests.
To learn how to install the backend and its dependencies visit the software setup guide.
Data Schemas
Newt is a python module centered on generation of valid data objects for the Pipettin project. These data objects are protocols, their steps, platforms, workspaces, etc. Everything the robot needs to know in order to work.
Newt's sole purpose is to provide convenience functions for generating and validating JSON representations of pipetting objects, against a set of JSON "schemas" for each type of data. This ensures the consistency and correctness of the generated JSON objects.
Data schemas are also defined in the backend's code, and must match each other.
Source: https://gitlab.com/open-la/pipettin-newt
Licensing terms can be found in the repositories.
PyLabRobot
We have written adapters to control the robot using PyLabRobot, a python library to write protocols programatically.
For more information browse the example notebook. More notebooks are available in the PLR fork's repository.
Note that our fork is limited to work with piper for now.
Additional software
These extend the functionality of the Pipettin Bot, and may be required by the controller's plugins:
- Mix protocol generator: https://gitlab.com/open-la/pipettin-mix
- Device manager: https://gitlab.com/open-la/pipettin-coorder
Database
A database is an organized collection of structured information, or data, typically stored electronically in a computer system. A database is usually controlled by a database management system (DBMS).
Most databases use structured query language (SQL) for writing and querying data. SQL is a programming language used by nearly all relational databases to query, manipulate, and define data, and to provide access control. Although simple, these early systems were inflexible.
Pipetting' Bots database use no structured query language (NoSQL). NoSQL databases came about as a response to the growth of the internet and the need for faster speed and processing of unstructured data.
A NoSQL, or nonrelational database, allows unstructured and semistructured data to be stored and manipulated (in contrast to a relational database, which defines how all data inserted into the database must be composed). NoSQL databases grew popular as web applications became more common and more complex.
MongoDB
MongoDB is a source-available cross-platform document-oriented database program. MongoDB uses JSON-like documents with optional schemas.
For data storage and retrieval, the Pipettin Bot app, Pipettin Writer, uses MongoDB, a NoSQL database. MongoDB stores the configurations of workspaces, platforms, and protocols, making it easy to manage and retrieve data related to the robot's operations.
Pipettin Bot uses MongoDB v3.2.12 version. More information about installation and requirements here.
Equipment
Integrations with active "benchtop" equipment are a planned feature.
Information on this front can be found in the Equipment page.
PocketPCR
Prototype adaptation of the PocketPCR to our system.
Info
Under development.
Discord thread https://discord.com/channels/1042462799772782613/1130552183105015950/1130552183105015950
Thermocyclers, also known as PCR machines, are used in molecular biology for the polymerase chain reaction (PCR). The basic idea of a thermal cycler is that it provides a thermally controlled environment for PCR samples.
A thermal cycler usually contains a heating block with holes or depressions in it that receive sample tubes. For the PCR reactions to work properly, the block must change temperature at specific times, and spend specific durations of time at specific temperatures.
Source: https://gitlab.com/open-la-deps/forks/equipment/PocketPCR
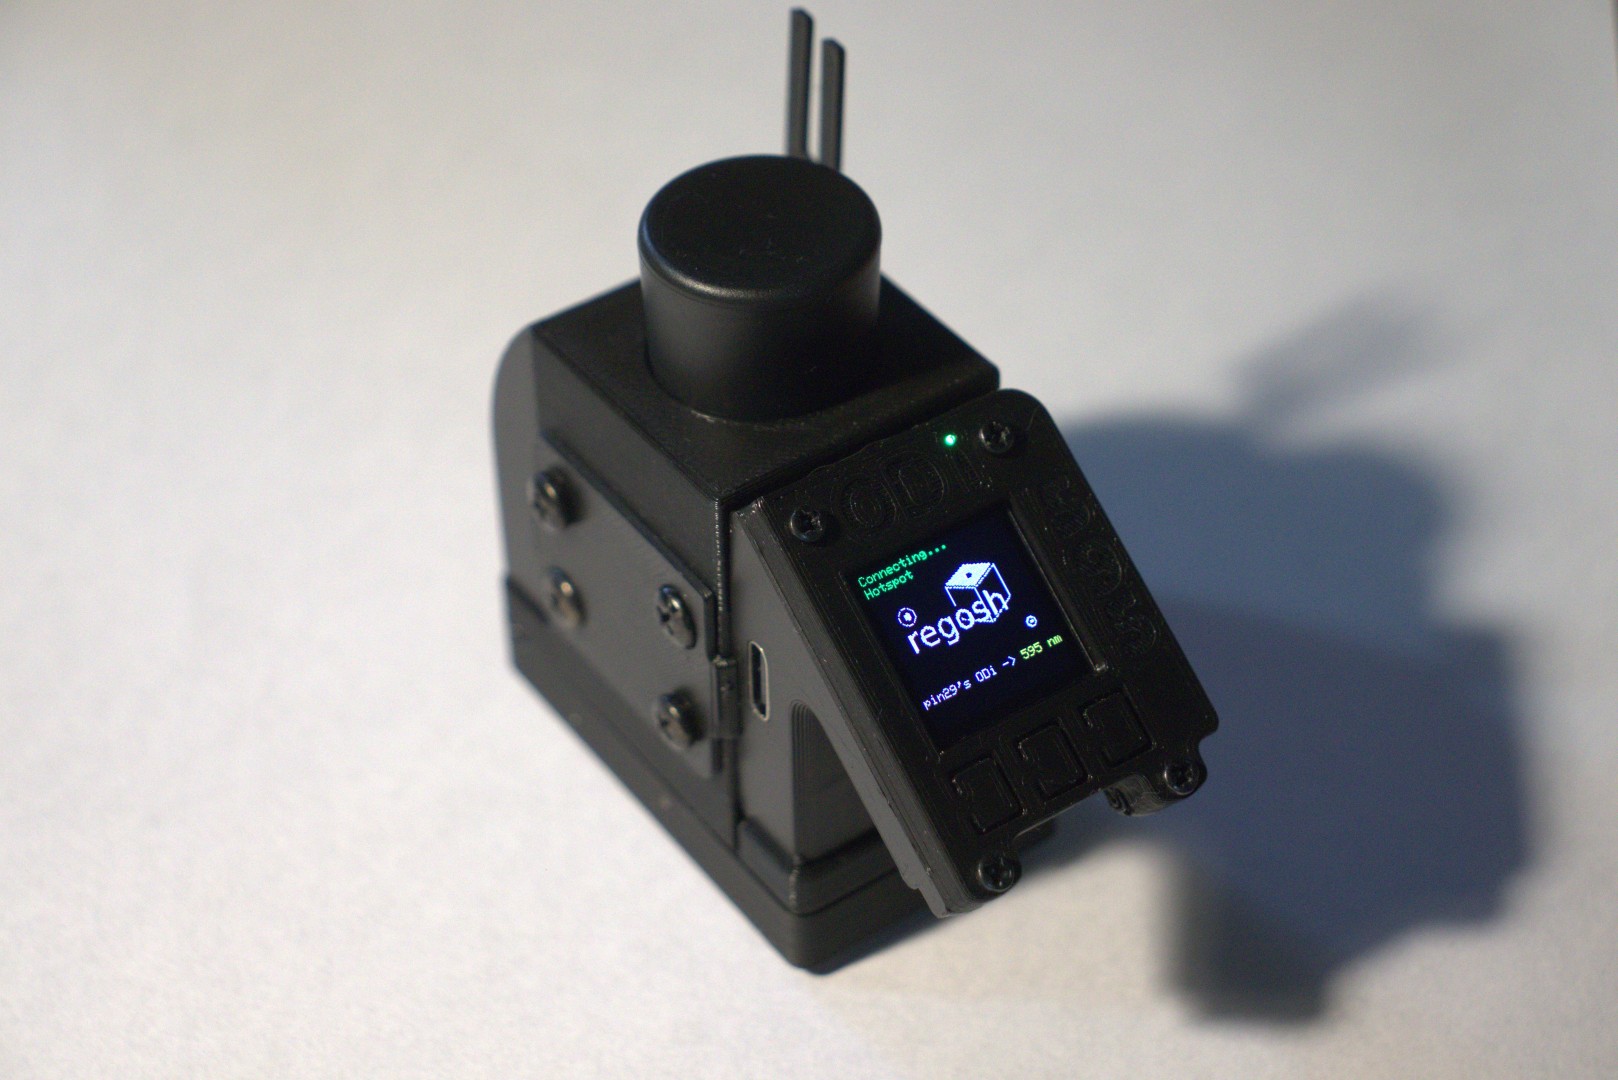
Colorimeter
Prototype adaptation of a colorimeter to our system.
Info
Under development.
Discord thread https://discord.com/channels/1042462799772782613/1125799842111832155
Issue for the task: https://gitlab.com/open-la/pipettin-bot/-/issues/200
Colorimeters are devices that measure the color of a sample. They do this by passing light through the sample and measuring how much of the light is absorbed at different wavelengths. The color of the sample is then determined by comparing the absorbance spectrum to a known standard.
We are working on an automation-friendly single-wavelength luminometer, in collaboration with the awesome people at IO-Rodeo.
Sources:
- Initial prototype: https://gitlab.com/open-la-deps/forks/equipment/photo-colorimeter
- Current version: https://gitlab.com/open-la/equipment/esp-iorodeo-colormeter
Centrifuge
Prototype micro-centrifuge to our system.
Info
Under development.
Discord thread https://discord.com/channels/1042462799772782613/1128199805122920509
Issue for the task: https://gitlab.com/open-la/pipettin-bot/-/issues/212
More information here.
Navigation:
Previous: ← Getting Started | Next: Assembly Guide →