Assembly Guide
Assembly Guide
Information and links to assemble or fabricate a complete Pipettin Bot MK3.
Required skills and resources
Making from the kit:
- Patience.
- Time:
- From a kit: about 5-10 days worth of afternoons, depending on your skill and resourcefulness.
- Electronics:
- Basic Arduino-level stuff (e.g. dupont wires, connectors, etc.).
- Simple tools:
- Hex screwdrivers and keys for metric screws (up to M5), and an 8 mm wrench.
- Wire cutters, pliers.
- Superglue or stapler.
- A good square.
- All of the parts in the BOM.
Making from scratch:
- More patience.
- More time:
- Add at least two weeks to the above, depending on your skill and resources, for manufacturing.
- A lot of waiting, for 3D-prints and delivery of parts.
- Usage of workshop tools.
- Unless your supplier cuts all parts to the required lengths, you will need a cutting tool for metal (aluminum and steel), for example: angle grinder, saw, etc.
- General skills or intuition for crafting will be useful. Some parts require alignment, for which you might use a level tool, a carpenter's square, or custom jigs.
- It is important to know how to use measuring tools (calipers, measure tape) for different purposes (alignment, cutting, etc.).
- Superglue and a hot-glue gun can come in handy.
- Wiring electronics:
- Wire cutting, using heat-shrink, very basic soldering (for soldering headers on long wires), etc.
- No custom PCBs are needed.
- Overall, nothing fancy, only Arduino-level stuff (i.e. dupont wires and headers).
- Basic 3D-printing:
- Slicing, printing, post-processing.
- Some parts may need minor sanding or lubrication. I use graphite powder.
- A 3rd party may print stuff for you.
- Suppliers:
- Although we used very common parts, you will have to find suppliers and deal with them.
- Manufacturing equipment or services.
- 3D printing.
- Laser cutting: required for making several parts, some of them can be 3D-printed or made on a CNC-router instead.
- CNC mill: required for manufacturing the tip holders for the custom micropipette tool.
- CNC router: may be used to replace the laser cutter on some cases, and is required to manufacture parts out of aluminum.
- Note: except for the 3D-printed parts, these services are not critical to the project, and can be omitted or replaced. For example, the removable baseplate system can be omitted, and the electronics case can be made with cardboard and hot glue.
BOM
The full Bill of Materials is available online, and was prepared using GitBuilding.
Most of the 3D models needed to make this machine have been exported from FreeCAD to STEP or STL format, for your convenience.
![]()
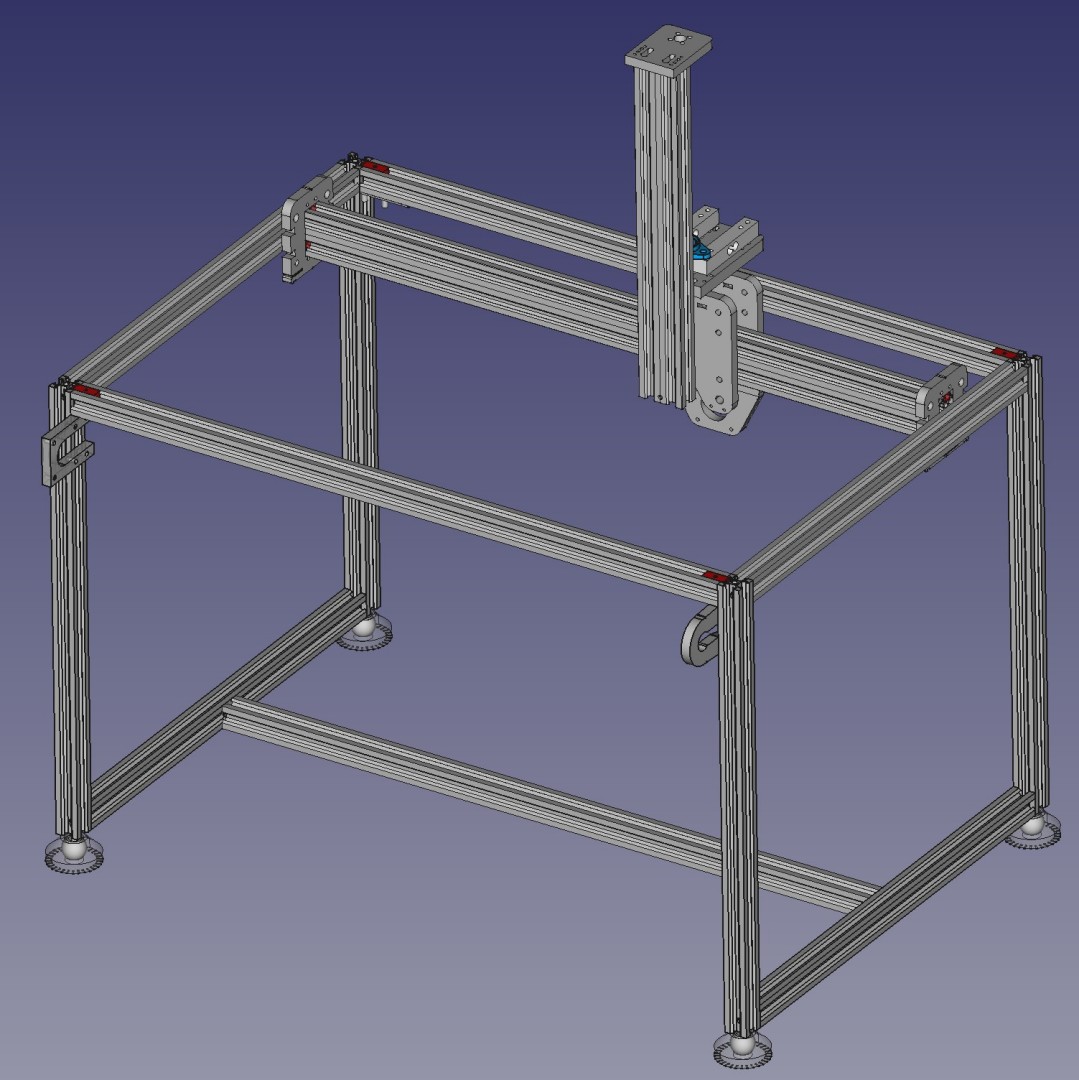
Step 1: Support frame
Follow the steps at Structural Frame.
Briefly, throughout this stage you will:
- Assemble a support structure for the XYZ parts, using 2020 aluminum profiles.
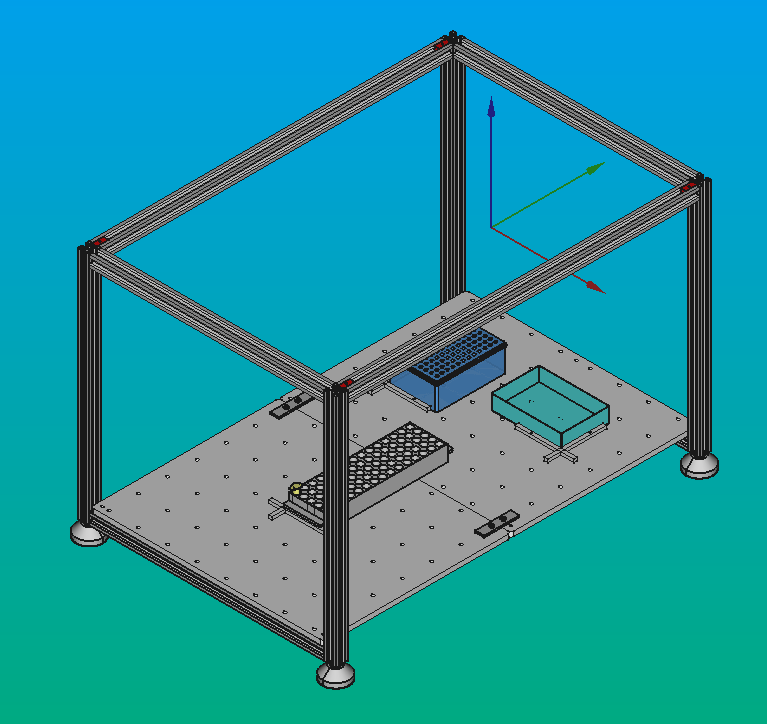
Expected result:
Note
Dimensions shown in screenshots may be illustrative.


Step 2: Baseplate
Follow the steps at the Baseplate guide.
Briefly, throughout this section you will:
- Fabricate the baseplate with a CNC laser cutter.
- Print and test the platform aligners(a.k.a. "curbs" or "anchors").
- Place the baseplate onto the structural frame.
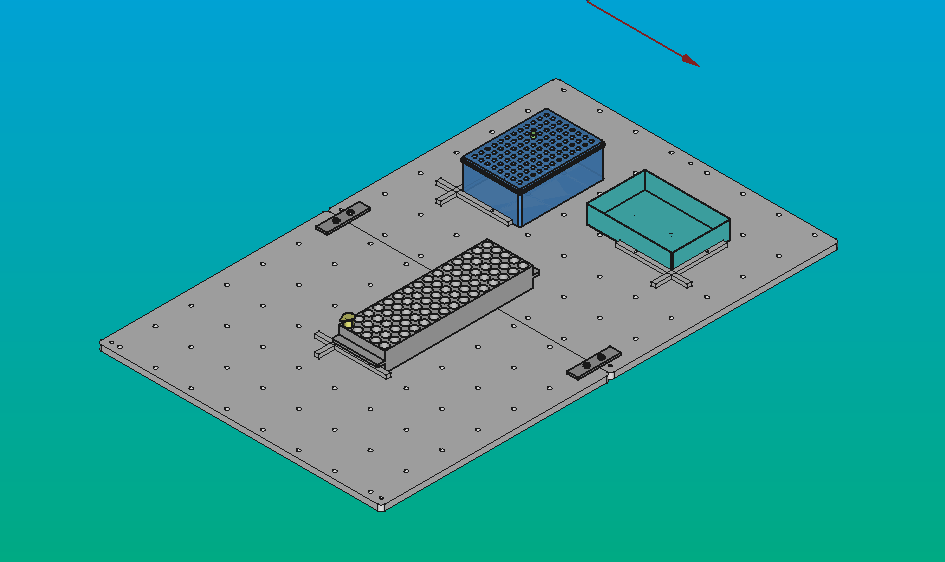
Expected result:


Step 3: Backpanel
Follow the steps at Backpanel.
Briefly, throughout this section you will:
- Make Pipettin Bot's Backpanel
- Attach it to the structural frame
Expected result:

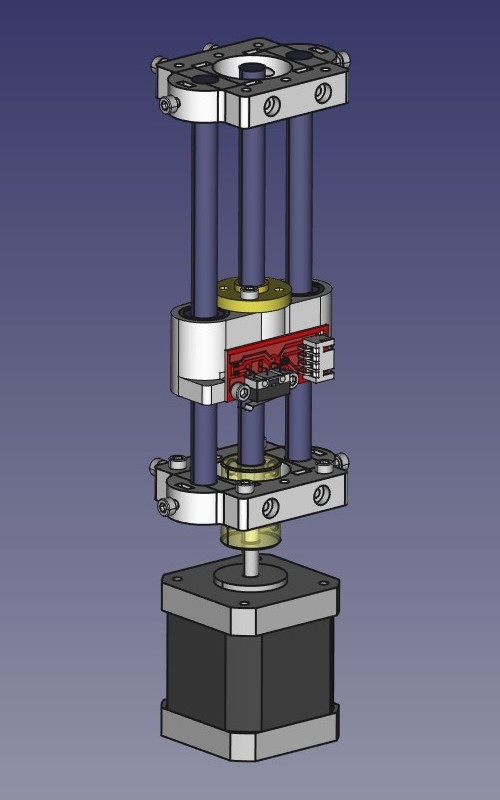
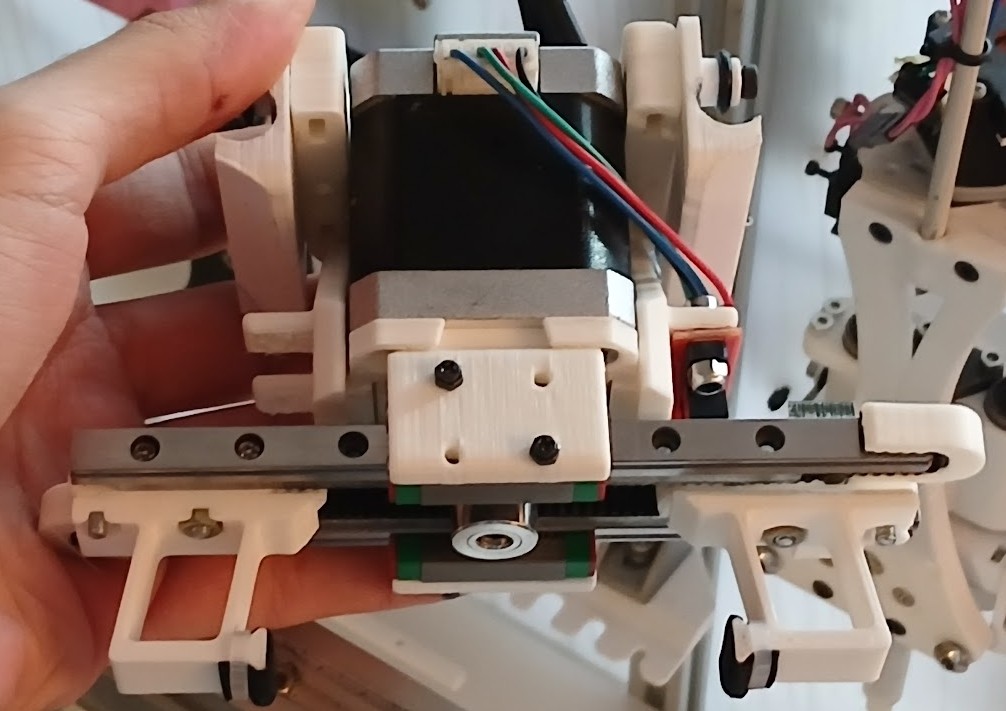
Step 4: Motion system
Follow the steps at Motion System.
Briefly, throughout this stage you will:
- Build and assemble the motion system
- Attach the motion system to the frame.
- Add the GT2 transmission belts to the CNC frame.
Expected result:
Motion system mounted on the structural frame
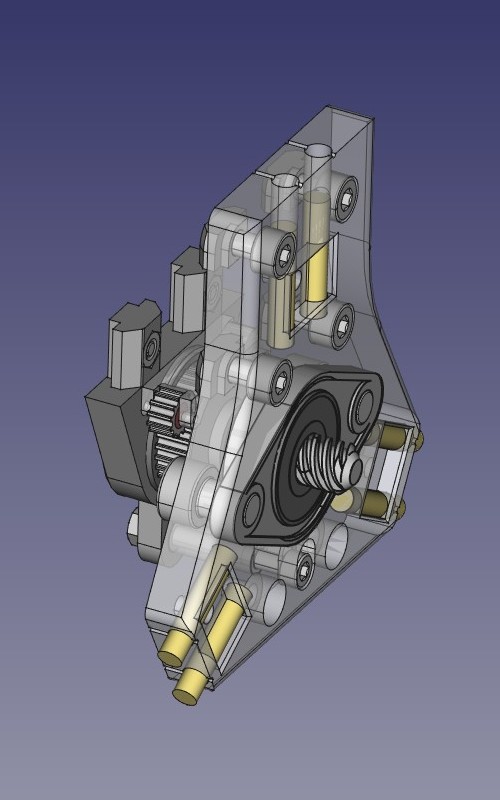
Step 5: Tool-changer
Instructions to fabricate the tool-changer and its remote actuator.
Follow the steps at Tool-changer.
Briefly, throughout this stage you will:
- Build the tool-changer mechanism, and attach it to the motion system.
- Build the remote actuator, and attach it to the backpanel.
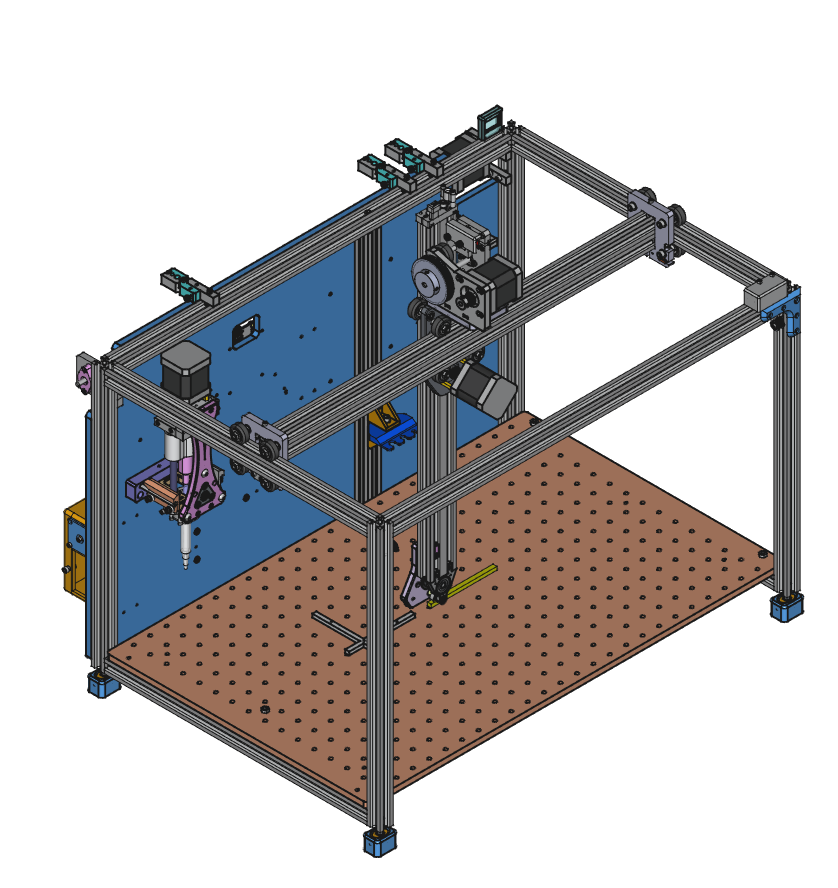
Expected result:

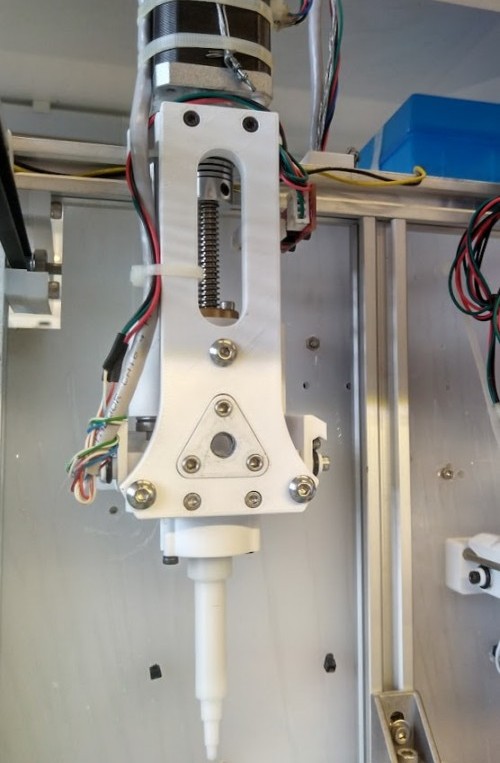
Step 6: Tools and Posts
Instructions to fabricate tools and their accessories.
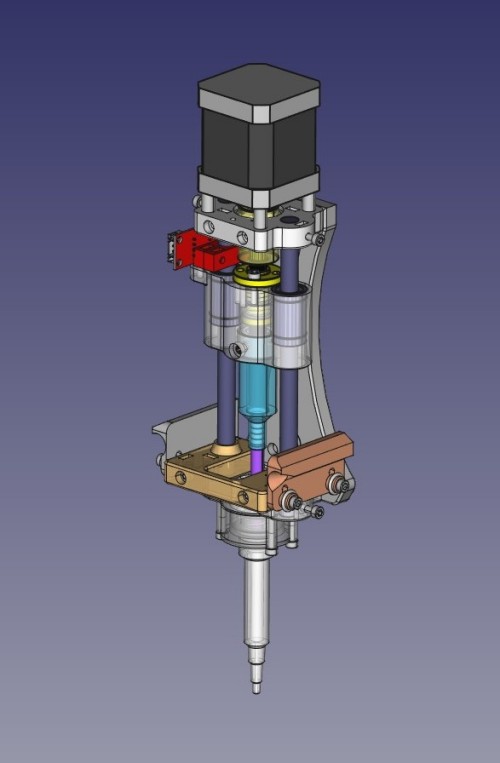
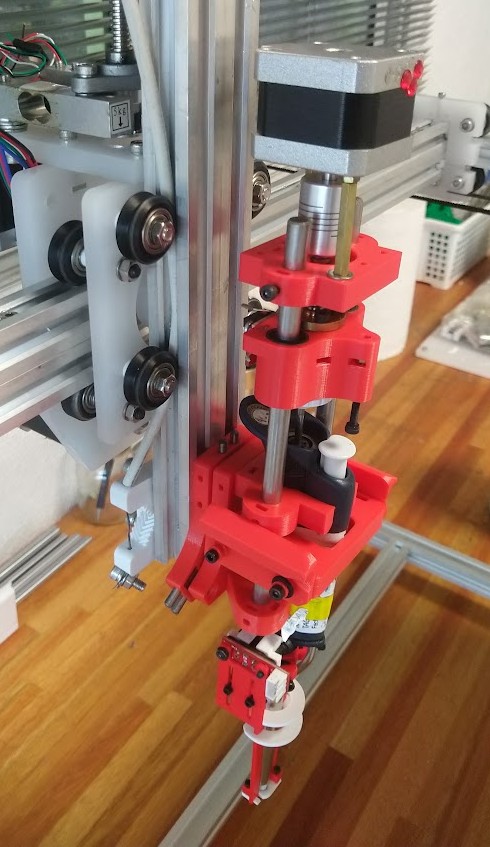
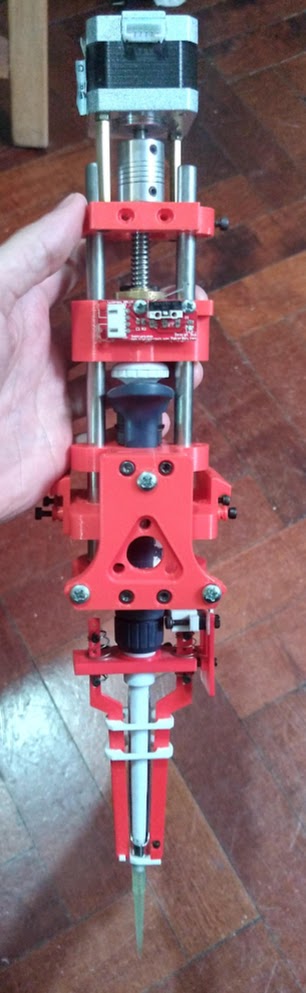
OLA Micropipette
In this step you will:
- Build our multi-tip compatible electronic micropipette tool.
- Build and install its parking post to the back panel.
- Attach a tip-ejection post to the structure.
Follow the steps at:
Expected result:
Micropipette Adapter
Hand-held micropipettes can be used, if an adapter exist for them.
In this stage you may:
- Make two adapters for "Gilson" micropipettes (p20 and p200 are supported).
- Build and install their tool posts.
Follow the steps at:
Gripper X1 Tool
A single-DOF parallel gripper tool by OLA: Gripper X1
WIP
This tool is a work in progress: https://gitlab.com/open-la/equipment/gripper
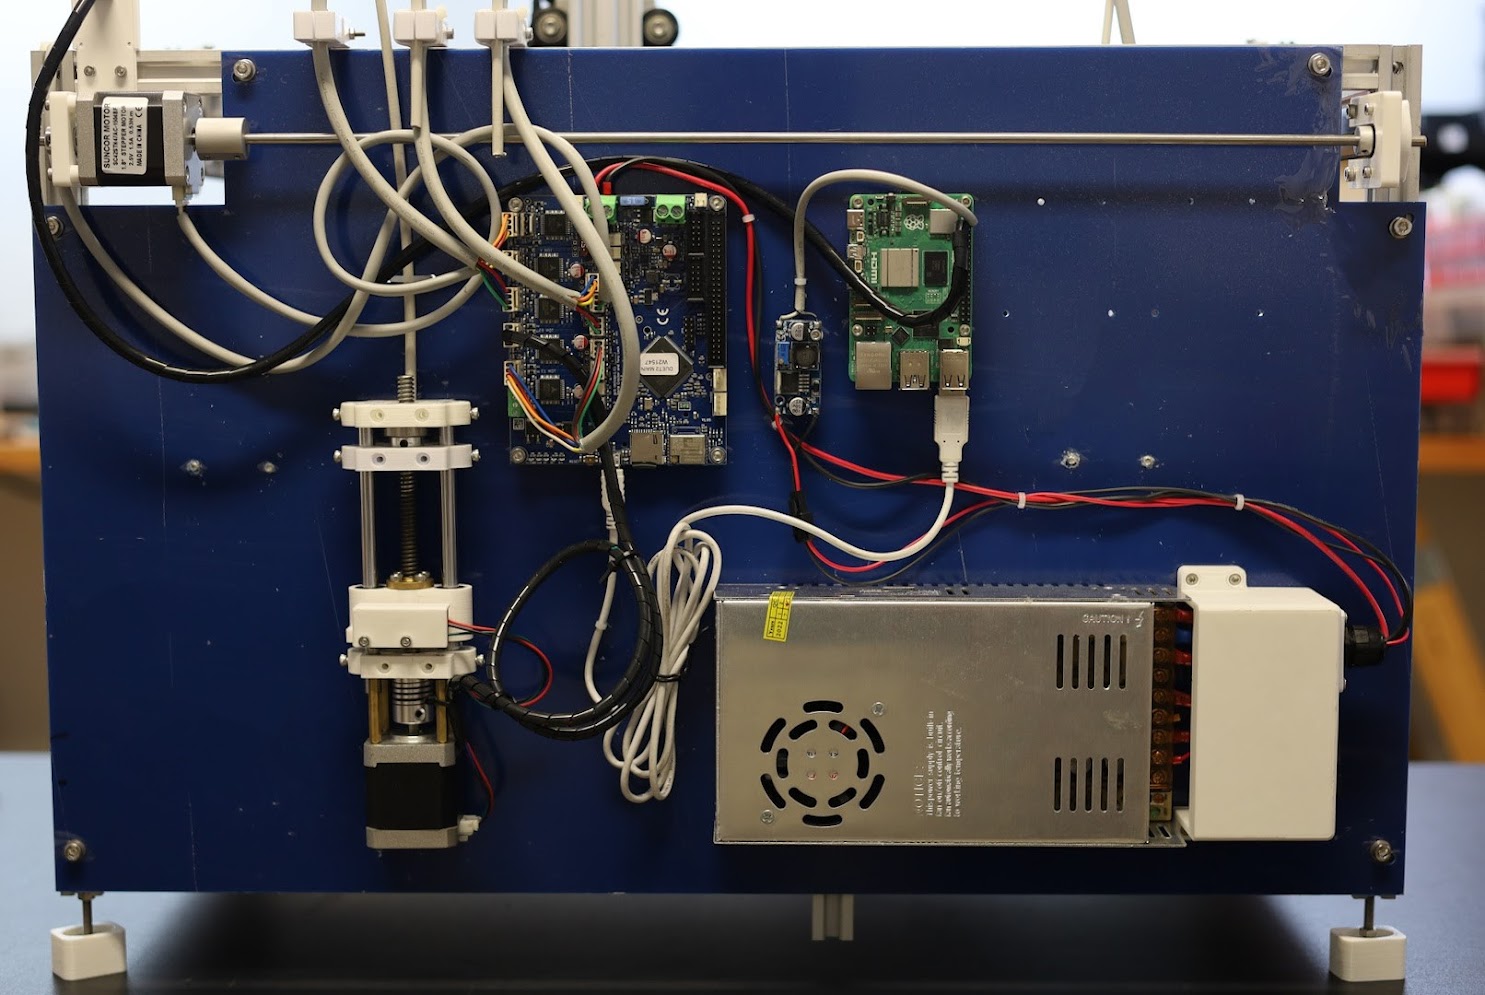
Step 7: Electronics
Follow the steps at the Electronics assembly guide.
Briefly, throughout this stage you will:
- Assemble and attach the electronics case.
- Attach limit switches and wire the motors.
- Manage cables.
- Wire the remaining connections (USB / GPIO).
Note
You have substantial freedom for laying out your cables, but it is important to have an idea of how other objects and cables will interact with the backpanel.
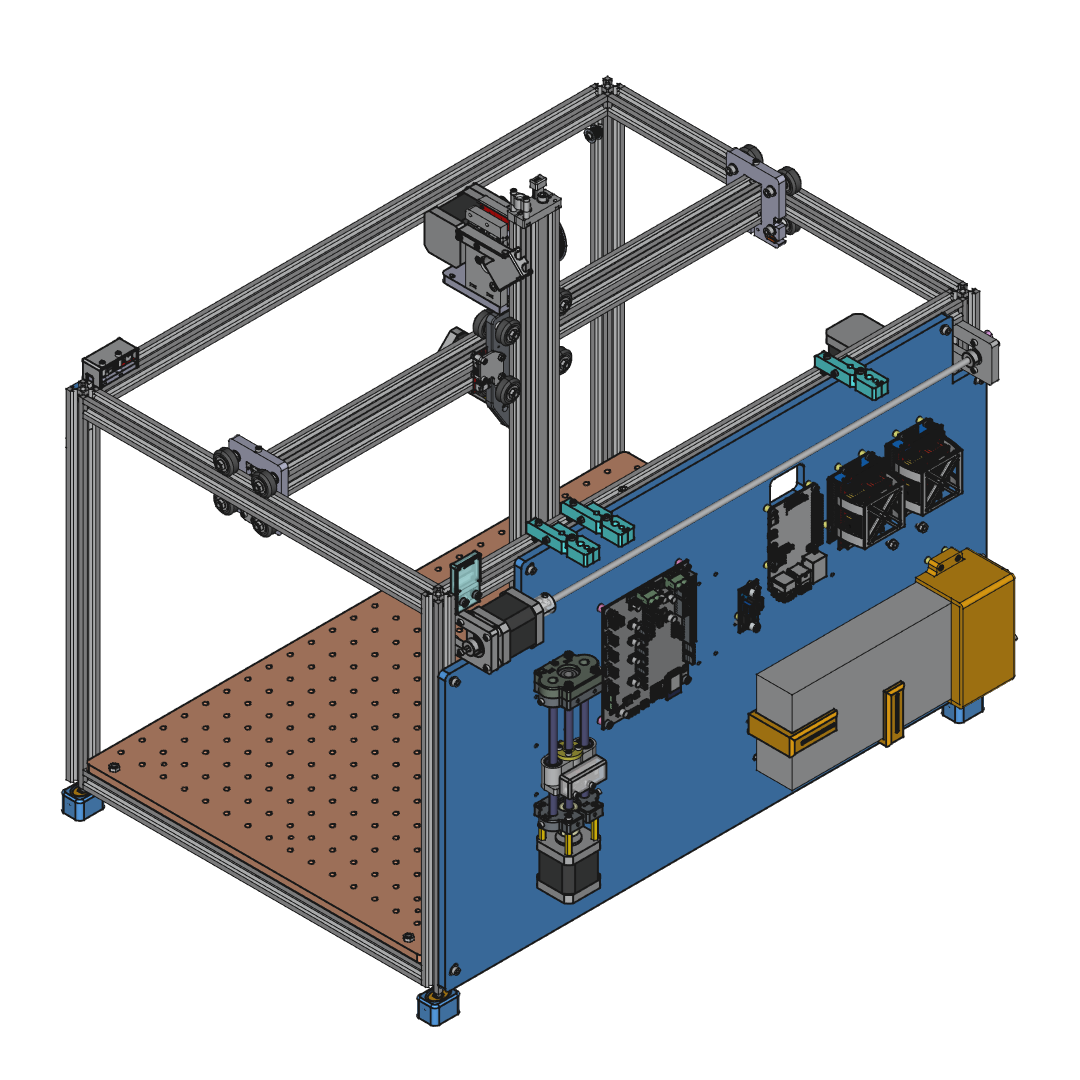
Expected result:
Step 8: Setup
Congratulations! You've finished the build :) Now it's time to setup the stuff!
Briefly, throughout this stage you will:
- Set up the Rapsberry Pi.
- Setup the Arduino with CNC firmware.
- Configure the CNC firmware.
- Adjust Vref on the stepper drivers.
- Run basic tests on the software and CNC firmware.
Follow the main setup guides:
Congrats!
You've built a pipetting robot from scratch.
Now your robot needs to be told where pipettes and tubes are, how to place tips, discard them, and so on...
To that end, proceed to the Calibration Guide.
But... if you want to play with it now, you may try going over the Usage Guide, and open the "Joystick" application to move the robot around.
Stay hydrated!
Navigation:
Previous: ← Technical Overview | Next: Calibration Guide →